


Your finish allowances are realistic when the selections you actually want fit inside them. Most homeowners find out one category at a time, standing in a showroom, but you can check before you ever start shopping.
I’m Olivia Benson with Mix & Mesh. In this guide, I’ll show you where to find your allowances, the one question that changes what they’re really worth, and how to test them against the selections you love.
This happens in Design It, the stage of the Season Method where you make every selection before construction starts.
Why This Matters for Your Build
Allowances sit in your contract looking official, so it’s natural to assume they already match what you have in mind. Often they don’t, and usually for ordinary reasons. A detail you mentioned on a call may not have made it into the contract, or a number may be a placeholder for decisions everyone expects to make later, which is fair.
Either way, each allowance was set before you’d chosen anything, based on a typical house. That’s a real number, but it most likely isn’t your number.
This guide helps you:
- See what each allowance can actually buy before you fall in love with a selection it can’t cover.
- Catch a short allowance while there’s still time to adjust it, instead of paying the difference on several categories late in the build.
- Go into conversations with your builder with clear numbers, which makes any adjustment easier for both of you.
When homeowners bring me an estimate to review, showers are where I see this most. The shower allowance often covers a pressure-balance valve, the basic control that runs a single showerhead, and nothing else. But the homeowner wanted a hand shower, or a rain head and body sprays in the primary bath, which takes a different valve, like a thermostatic one, and more parts than the allowance planned for.
Once we walk through it, most of them say, “Oh, I did want that.” Caught during review, it’s an easy adjustment. Caught mid-build, it becomes a change order.
How to Check Your Finish Allowances
Step 1: Find every allowance in your estimate
Go through your estimate or contract and list every line labeled as an allowance, like flooring, tile, cabinetry, countertops, plumbing fixtures, lighting and appliances. Note which rooms each one covers, and whether installation has its own labor allowance.
If something on your wish list doesn’t show up anywhere, like a fireplace surround or closet shelving, ask whether it’s already included or something you’re expected to buy yourself.
Before you go line by line, it helps to know whether the estimate as a whole is in a realistic range for your build. My Build Cost Estimator gives you that benchmark from your zip code and square footage.
Step 2: Ask whether each allowance includes labor
This one question changes what an allowance is worth. In a materials-only allowance, the whole amount goes toward the product. In a materials-plus-labor allowance, installation comes out of the same number.
Your design drives that labor more than most people expect. The same tile laid in a straight pattern takes far less time than a checkerboard or a herringbone. A shower with lots of turns and plane changes needs more cuts and more trim pieces, especially in marble, than one finished with a simple metal edge. When installation shares the allowance, every one of those choices leaves less for the tile itself.
Ask your builder to confirm which setup applies to each category, in writing.
Step 3: Turn each allowance into a unit price
A total is hard to shop with, but a unit price is easy. Your builder should give you each allowance in the unit that fits the material. These are the ones you’ll see most often:
| Selection | Usually priced by |
|---|---|
| Wood, vinyl plank and tile flooring | Square foot |
| Carpet | Square yard |
| Cabinetry | Linear foot |
| Countertops | Slab, sometimes square foot |
| Tile trim and edge pieces | Linear foot or piece |
| Plumbing and light fixtures | Each fixture |
| Cabinet hardware | Each piece |
| Appliances | Each, or as a package |
If a unit on your estimate looks unusual for the material, it’s fair to ask how it was figured.
Leave room for overage, the extra material ordered to cover cuts and waste. In my experience, it runs anywhere from 10 to 30%, especially for flooring and patterned tile. Stone is bought by the slab, so countertops that measure 200 square feet may mean paying for 240, because that’s what the slabs add up to. That’s normal, not padding.
The cleanest unit price comes from your builder with overage already figured in. If you only have a total, ask for the unit price and the overage they planned before you try to divide it yourself.
Step 4: Test a few real picks, down to the brand
Choose two or three products you’d genuinely be happy with for each allowance, and get as specific as you can. Prices swing widely inside a single category. Telling your builder you want quartz isn’t the same as telling them you want Cambria, which sits well above a builder-grade quartz. Two faucets can look alike while Brizo and Delta sit at very different price points.
Where there’s no brand, like natural stone, the material itself does the same job: quartzite and marble price very differently from quartz. Price your picks against your unit number, including the pieces people forget, like the trim and edge pieces for tile, or a faucet for the laundry or bar sink. Then mark each category as fits, tight or over.
If you haven’t built your selection list yet, my Finish Selection Checklist lists every selection you’ll need to make.
Don’t wait until your showroom appointment to realize your dream tile is three times over budget.
Step 5: Decide what happens if you go over
In most contracts, if you go over an allowance, you pay the difference, usually through a change order. Ask how that’s billed and whether the builder adds markup, a percentage on top of the difference.
If several categories come up tight, decide where your money matters most. Protect the selections that touch every room and are hardest to change later, like flooring. Save where it’s easy to upgrade down the road, like light fixtures or cabinet hardware, which can be swapped once you’ve moved in.
Olivia’s Tips
- Line up allowances when you compare bids. A bid can look lower simply because its allowances are lower, like a smaller number for plumbing fixtures. Put each bid’s allowances side by side so you’re comparing the same house.
- Bring your numbers to the showroom. Share your unit prices with the rep at the start of the appointment, so they pull options that fit instead of starting with the showpiece.
- Adjust before you cut the idea. Pros call this value engineering. When a client’s selections came back well over budget, we chose a standard vanity height instead of custom and a tile accent wall instead of a fully tiled room. Her design held together, and the numbers came back in line.
Frequently Asked Questions
Do I get money back if I spend less than the allowance?
Often, yes, as a credit on your contract, but it depends on how your contract is written. Ask whether unused money comes back to you or can move to another category.
Can I ask for a higher allowance?
Yes, and the best time is before you sign. A higher allowance raises the contract price, but it gives you a truer picture of your budget from the start instead of a string of surprises later.
Do I have to use my builder’s suppliers?
It depends on your builder. Some require certain suppliers for pricing or warranty reasons, and their pricing can be better than what you’d pay on your own. If you want to buy something elsewhere, ask how installation and warranty work for items you supply.
Is an allowance the same as a contingency?
No. An allowance is a budget for a specific selection you haven’t made yet. A contingency is a separate cushion for surprises nobody could plan for, like a beam that has to be upsized after an inspection.
Your Finish Allowances Checklist
Season: Design It (before your first showroom appointment)
Who’s involved: you, your builder, and your designer if you have one
- List every allowance and the rooms it covers.
- Flag anything on your wish list that isn’t covered.
- Confirm materials only or materials plus labor, in writing.
- Get each allowance as a unit price, with overage included.
- Price two or three real picks per category, down to the brand.
- Mark each category fits, tight or over.
- Decide what to protect and what to upgrade later.
Before You Start, Ask Your Builder
- How was each allowance figured, and in what unit?
- Does it include labor, or just materials?
- How much overage did you plan for?
- Which suppliers can I use, and do I get your pricing?
- If I go over, how is the difference billed? If I come in under, is it credited back?
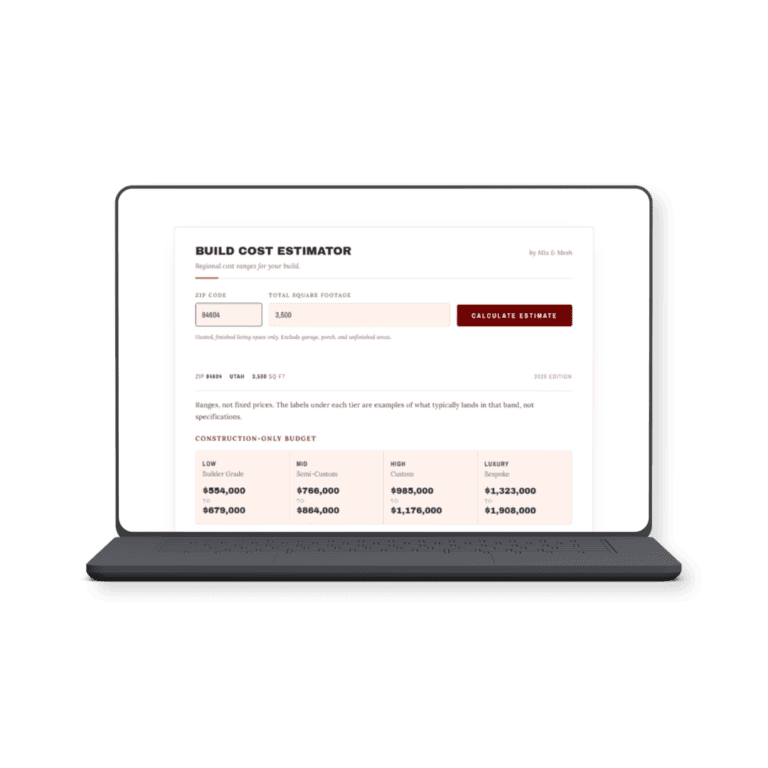
Build Cost Estimator gives you a benchmark for what a home like yours costs to build in your zip code, so you can tell whether an estimate, allowances and all, is realistic for your build. It won’t price your tile, but it shows you whether the whole picture makes sense. It comes with a full year of access.
Share Your Build
Post your progress or finished room in House Plans and Build Costs, my free community of over 60,000 homeowners and pros. Your home could be featured in a future guide.
Terms in This Guide
Allowance · Change order · Contingency · Overage · Value engineering
Related Guides
- Room-by-Room Finish Selection Checklist for New Builds and Remodels
- What to Pick and When: Interior Finish Selection Timeline
- Where to Splurge and Where to Save During Your Build
- What to Bring to a Design Showroom and How to Prepare for Your Visit
Originally published [date].


